
Painting steel seems straightforward. Just slap on some paint, right? Not even close. Over 60 percent of premature paint failures on steel are caused by improper surface preparation. Most people think the colour or type of paint matters most, but the real secret lies in what you do before the brush ever touches the metal. If you miss even a single contaminant or skip a basic cleaning step, your perfect finish is toast before it even starts.
Table of Contents
- Step 1: Assess The Surface Condition Of The Steel
- Step 2: Clean The Steel Thoroughly To Remove Contaminants
- Step 3: Sand Or Abrade The Surface For Optimal Adhesion
- Step 4: Apply A Rust Inhibitor If Necessary
- Step 5: Inspect The Prepared Surface Before Painting
Quick Summary
| Key Point | Explanation |
|---|---|
| 1. Conduct a thorough surface assessment | Inspect for corrosion, contaminants, and irregularities to determine the necessary preparation steps. |
| 2. Clean the steel surface effectively | Use an industrial degreaser to remove all contaminants, ensuring proper paint adhesion and protection. |
| 3. Sand for optimal surface texture | Create a slightly rough surface profile by sanding, promoting better paint bonding and durability. |
| 4. Apply a suitable rust inhibitor | Prevent future corrosion by using a quality rust inhibitor before painting, especially in moist environments. |
| 5. Perform a final surface inspection | Ensure the surface is primed and flawless through careful visual and tactile checks before any paint application. |
Step 1: Assess the Surface Condition of the Steel
Successful steel painting begins with a meticulous surface assessment. Understanding the current state of your steel surface determines the entire preparation strategy and ultimately impacts the quality and durability of your final paint finish.
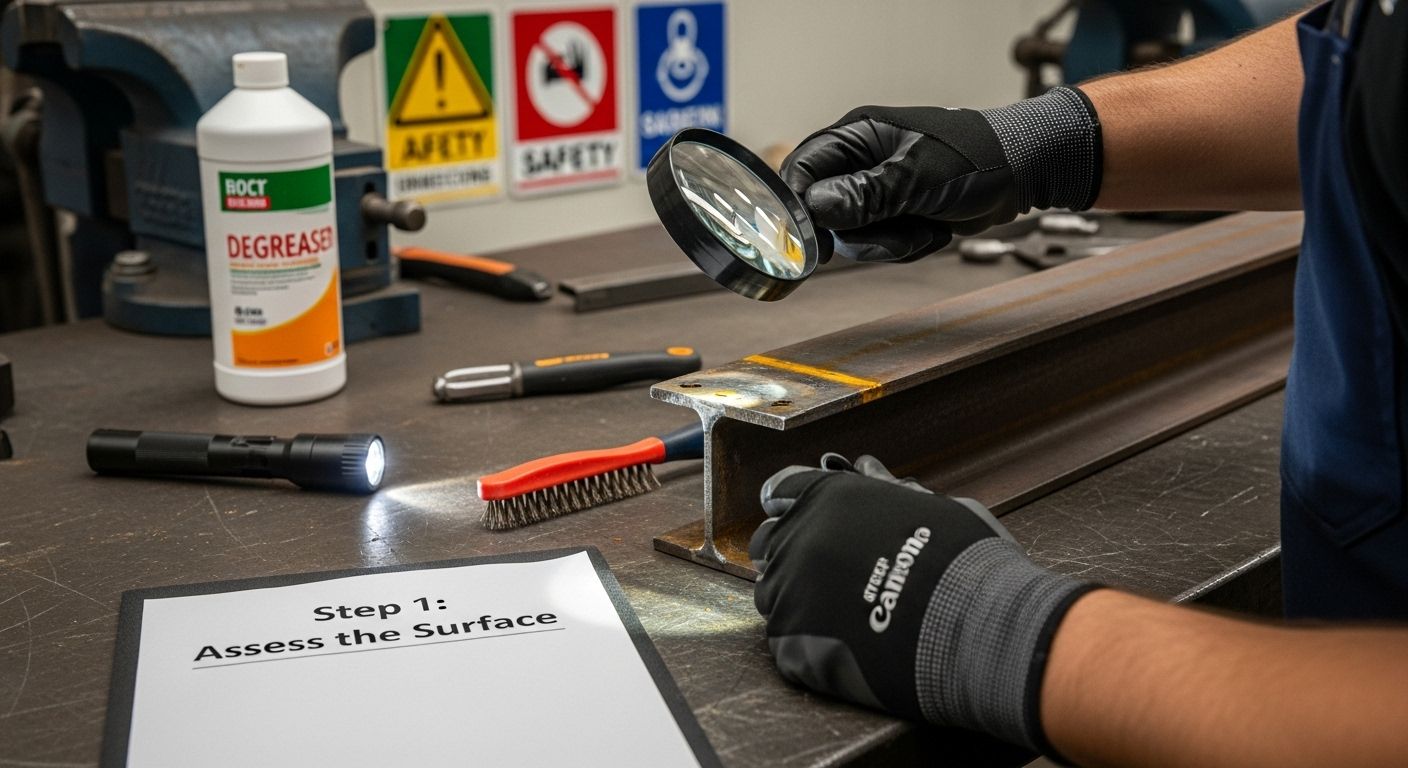
Start by conducting a comprehensive visual inspection of the steel surface. Look carefully for signs of existing corrosion, paint degradation, or surface contaminants that could compromise your painting project. Run your hand gently across the surface to detect rough patches, flaking paint, or subtle irregularities that might not be immediately visible.
You will need specific tools for a thorough assessment. Gather a bright flashlight, magnifying glass, wire brush, and clean white cloth to help you examine the steel’s condition comprehensively. Pay special attention to areas prone to moisture accumulation or mechanical stress, which are more likely to show signs of deterioration.
Check for different types of surface damage that require targeted preparation:
- Rust spots indicating oxidation and potential structural weakening
- Old paint layers with cracking or peeling edges
- Grease or oil residues from previous manufacturing or handling processes
- Surface scaling or mill scale from original steel production
Discover our comprehensive guide on checking steel quality to understand more about surface evaluation techniques. The goal is to create a clean, smooth surface that will allow paint to adhere effectively and provide long-lasting protection.
Below is a reference table outlining the essential tools and materials needed for each stage of preparing steel for painting, helping ensure you have everything on hand before you start.
| Step | Required Tools & Materials | Purpose / Key Notes |
|---|---|---|
| Surface Assessment | Bright flashlight, magnifying glass, wire brush, clean white cloth | Identify corrosion, contaminants, and surface defects |
| Cleaning | Industrial degreaser, lint-free rags, soft scrub brush, gloves, safety goggles | Remove all grease, dust, and contaminants |
| Sanding/Abrasion | Electric orbital sander, 80-120 grit sandpaper, dust mask, tack cloth, vacuum, safety glasses | Create rough texture for better paint adhesion |
| Rust Inhibitor Application | Rust inhibitor, lint-free rollers, spray equipment, respirator, paint tray, gloves, eyewear | Prevent future corrosion before painting |
| Final Inspection | LED work light, magnifying glass, lint-free cloth, microfiber rag, masking tape | Verify every part is smooth and properly prepared |
To verify your assessment, perform a simple adhesion test. Use masking tape to press firmly against the surface and quickly remove it. If paint chips or significant debris come off with the tape, you will need more extensive surface preparation before painting. A successful assessment means identifying every imperfection that could prevent a flawless paint finish.
Step 2: Clean the Steel Thoroughly to Remove Contaminants
Cleaning steel surfaces is a critical phase in preparing for painting that directly impacts the quality and longevity of your final finish. This step removes all contaminants that could prevent proper paint adhesion and compromise the protective coating.
Begin by gathering essential cleaning tools: industrial-strength degreaser, clean lint-free rags, soft-bristled scrub brush, protective gloves, and safety goggles. Safety is paramount when handling chemical cleaning agents, so ensure proper ventilation and wear appropriate personal protective equipment throughout the process.
Start the cleaning process by removing loose debris and surface dust using a soft brush or compressed air. Next, apply a specialized industrial degreaser specifically formulated for metal surfaces. Work systematically from one section to another, ensuring complete coverage. Scrub gently but thoroughly, paying extra attention to areas with visible grease, oil stains, or accumulated grime. Avoid using water alone, as this can introduce moisture that potentially accelerates rust formation.
Required cleaning tools and materials:
- Industrial-strength metal degreaser
- Lint-free cotton rags
- Soft-bristled scrub brush
- Protective rubber gloves
- Safety glasses
- Disposable cleaning cloths
After applying the degreaser, use clean rags to wipe away all chemical residue. Repeat the cleaning process if necessary, ensuring no oily or greasy patches remain. Explore our comprehensive guide on understanding steel preparation to gain deeper insights into metal surface treatment.
Verify the cleaning process by performing a simple white cloth test. Wipe the surface with a clean white cloth and inspect for any remaining discoloration or residue. A perfectly cleaned surface will leave the cloth completely clean, indicating that all contaminants have been successfully removed and the steel is ready for the next preparation stage.
Step 3: Sand or Abrade the Surface for Optimal Adhesion
Sanding and abrading are critical processes that create the ideal surface profile for paint adhesion. This step transforms a smooth steel surface into a microscopically rough landscape that allows paint to grip and bond effectively, ensuring a durable and long-lasting finish.
Prepare your workspace by selecting the appropriate abrasive tools based on your steel surface condition. For most industrial steel surfaces, you will need an electric orbital sander, sandpaper with varying grit levels (typically 80 to 120 grit), dust masks, and safety glasses. Always work in a well-ventilated area and wear protective equipment to prevent respiratory issues from metal dust.
Begin sanding systematically, moving the orbital sander in consistent, overlapping passes. Apply moderate, even pressure to create a uniform surface texture. Do not oversand one area, which could create uneven depressions or weaken the steel surface. Focus on removing existing paint layers, rust spots, and creating a slightly rough texture that paint can mechanically bond with. Pay extra attention to corners, edges, and areas with previous corrosion or paint irregularities.
Essential sanding equipment:
- Electric orbital sander
- Sandpaper (80-120 grit)
- Dust mask
- Safety glasses
- Tack cloth
- Vacuum with fine particle filter
Learn more about checking steel surface quality to understand the nuanced requirements of surface preparation. After sanding, use a tack cloth to remove all loose particles. Follow up with a vacuum equipped with a fine particle filter to ensure a completely clean surface.
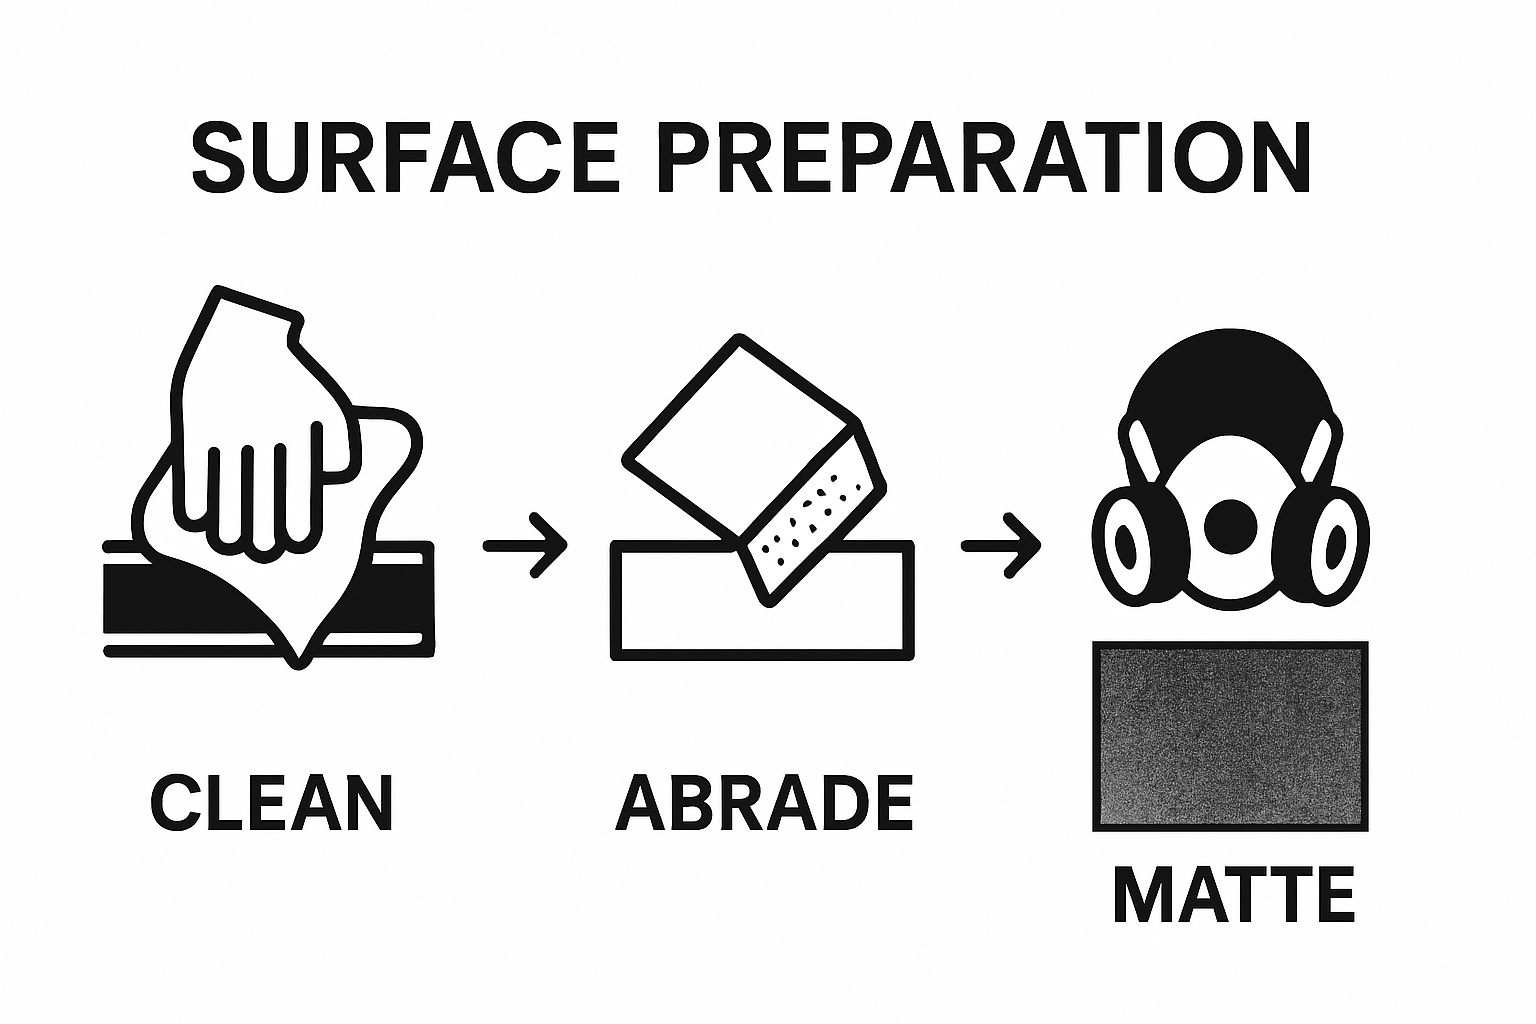
To verify your sanding work, perform a simple adhesion test. Run your bare hand across the surface feeling for a consistent, slightly rough texture similar to fine-grained sandpaper. The surface should look uniformly matte, without any glossy patches or uneven areas. This preparation ensures your paint will have the optimal mechanical bond, setting the stage for a professional-grade finish.
Step 4: Apply a Rust Inhibitor if Necessary
Rust inhibitors are your steel’s first line of defense against corrosion, providing critical protection before the final paint layer is applied. This step is crucial for preventing future oxidation and extending the longevity of your steel surface, especially in environments with high moisture or challenging industrial conditions.
Carefully inspect the steel surface for any signs of existing rust or potential corrosion vulnerability. Choose a rust inhibitor specifically designed for industrial steel applications, considering factors like environmental exposure, temperature variations, and the specific type of steel you are working with. Professional-grade zinc-based or phosphate-based rust inhibitors offer superior protection and create an ideal foundation for paint adhesion.
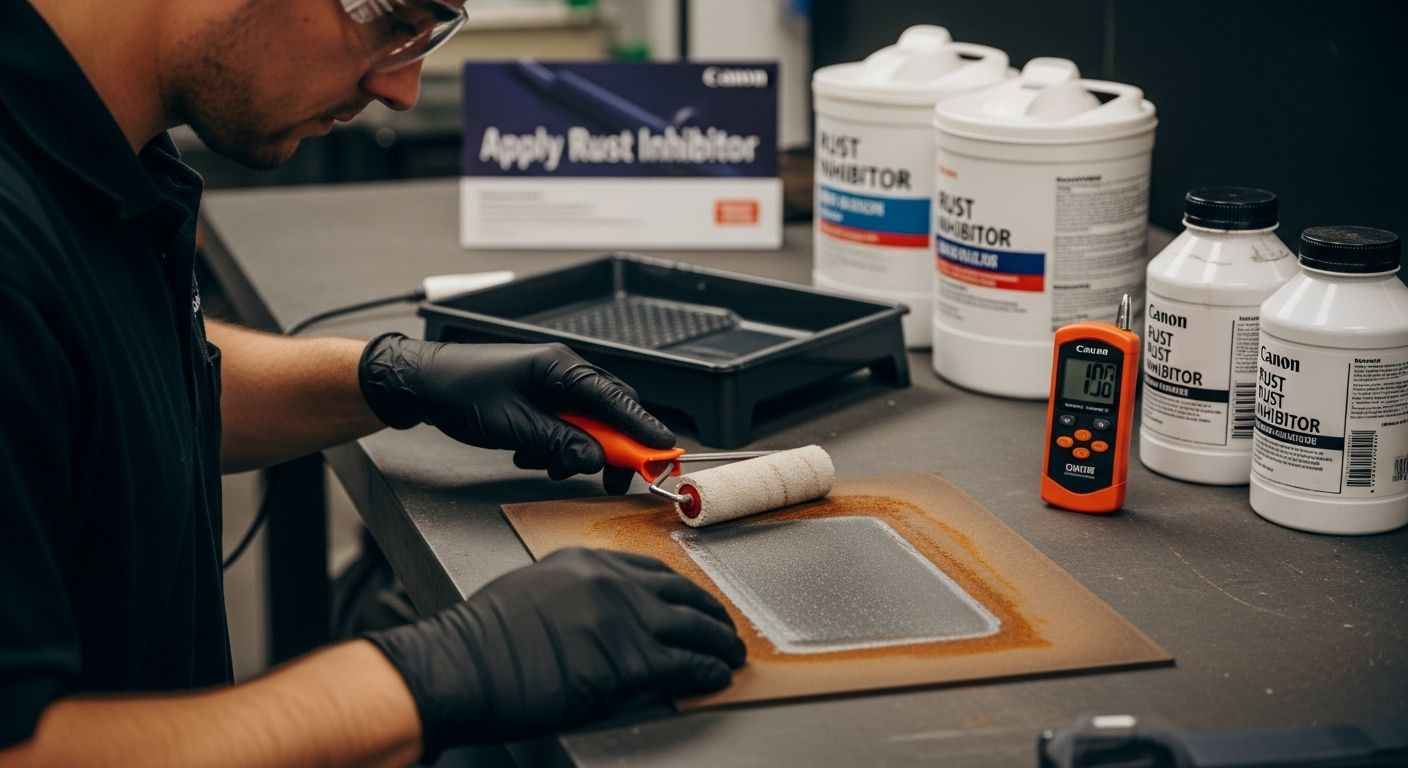
Apply the rust inhibitor using clean, lint-free rollers or high-quality spray equipment to ensure even coverage. Work methodically, starting from one edge and moving systematically across the entire surface. Maintain a consistent application thickness, avoiding pooling or uneven spots that could compromise the protective layer. Allow the inhibitor to dry completely according to the manufacturer’s recommended drying time, which typically ranges between 30 minutes to 2 hours depending on the specific product.
Essential rust inhibitor application tools:
- Chemical-resistant gloves
- Respirator mask
- Lint-free rollers
- Paint trays
- Protective eyewear
- Clean rags for potential touch-ups
- Temperature and humidity gauge
Read our comprehensive guide on understanding steel manufacturing to gain deeper insights into metal protection techniques. Ensure your workspace maintains appropriate temperature and humidity levels during application, as environmental conditions can significantly impact the rust inhibitor’s effectiveness.
To verify successful application, perform a visual and tactile inspection. The surface should appear uniformly coated with a thin, consistent layer that feels smooth and dry to the touch. There should be no visible gaps, drips, or uneven patches. A properly applied rust inhibitor will create a protective barrier that prepares your steel for the final painting stage, ensuring maximum durability and corrosion resistance.
This checklist table summarises the critical verification steps for each main preparation stage, giving you an easy way to confirm your steel is truly ready for painting.
| Preparation Stage | Verification Method | What to Look/Feel For |
|---|---|---|
| Surface Assessment | Visual and tactile check, masking tape test | All corrosion and contaminants detected |
| Cleaning | White cloth wipe test | Cloth remains clean, no residue or visible dirt |
| Sanding/Abrasion | Hand rub, visual matte check | Consistent, slightly rough texture, uniformly matte |
| Rust Inhibitor Application | Visual/tactile check after drying | Uniform coating, no drips or bare areas |
| Final Inspection | LED work light, magnifying glass, tape test | No grease, rust, uneven texture or remaining debris |
Step 5: Inspect the Prepared Surface Before Painting
The final preparation stage demands a meticulous surface inspection that can make or break your entire painting project. This critical step ensures that every square centimetre of steel is perfectly primed, free from imperfections that could compromise the paint’s adhesion and long-term durability.
Equip yourself with precision inspection tools including a bright LED work light, magnifying glass, white lint-free cloth, and clean microfiber rags. Natural daylight provides the best illumination, but a high-quality work light with neutral color temperature will help reveal subtle surface variations that might otherwise go unnoticed. Begin your systematic inspection by examining the steel surface from multiple angles, rotating and tilting your light source to expose potential irregularities.
Look specifically for telltale signs that could indicate inadequate preparation. Watch for microscopic rust spots, residual grease patches, uneven sanding marks, or areas where the rust inhibitor might not have been applied uniformly. Run your gloved hand gently across the surface, feeling for texture inconsistencies. A perfectly prepared surface should feel uniformly smooth with a consistent, slightly rough profile that provides optimal paint adhesion.
Critical inspection checkpoints:
- Complete removal of previous paint layers
- Uniform rust inhibitor coverage
- No visible grease or oil residues
- Consistent surface texture
- No remaining rust or oxidation spots
- Smooth transitions between sanded areas
Explore our comprehensive guide on checking steel quality to understand nuanced surface preparation techniques. Perform adhesion tests by applying and quickly removing a piece of masking tape. If paint chips, dust, or significant debris come away with the tape, your surface requires additional preparation.
The final verification involves a comprehensive visual and tactile assessment. Your steel surface should appear uniformly matte, with no glossy patches, visible contaminants, or texture inconsistencies. A perfectly prepared surface signals readiness for the final painting stage, promising a professional-grade finish that will withstand challenging industrial environments.
Achieve a Flawless Painted Steel Finish with Genesis Steel’s Premium Solutions
The journey to a perfectly painted steel surface starts long before the paint ever touches the metal. If you have struggled with peeling, poor paint adhesion, or premature rust, you know how crucial thorough preparation is. Our article broke down essential steps like surface assessment, deep cleaning, sanding for adhesion, and applying rust inhibitors. These steps are vital if you want your steel components to stand the test of time under South African conditions. But your foundation matters just as much as your prep. Inferior or mismatched steel grades can make flawless results impossible, costing you time, materials, and peace of mind.
Take your next step with Genesis Steel and choose a partner who guarantees the right steel products for every painting project. Our extensive range of quality hot-rolled steel sheets and plates gives you the foundation needed for professional results. Speak with our seasoned team today and ensure your prep delivers the durable, long-lasting finish you set out for. Visit us now and experience a new standard of reliability and expertise in every steel order.
Frequently Asked Questions
What is the first step in preparing steel for painting?
Successful steel painting starts with a surface condition assessment. Perform a comprehensive visual inspection to identify corrosion, paint degradation, or surface contaminants that need attention before moving on to cleaning and sanding.
How do I clean steel surfaces before painting?
Clean steel surfaces using an industrial-strength degreaser and lint-free rags. It’s essential to remove all contaminants, such as grease and dust, to ensure optimal paint adhesion. After applying the degreaser, wipe the surface clean and inspect it with a white cloth to confirm it is residue-free.
Why is sanding important in the steel preparation process?
Sanding creates a microscopically rough surface that enhances paint adhesion. By removing old paint layers and any irregularities, sanding helps ensure a successful bond between the steel surface and the paint, leading to a more durable finish.
When should I apply a rust inhibitor before painting steel?
Apply a rust inhibitor if your steel shows signs of rust or if it is located in a moisture-prone environment. This step protects the steel from future corrosion and creates a suitable base for paint adhesion, ensuring a long-lasting finish.